


Main Sections
The Extended Feature Set Training Tool is broken up into several sections. Use the tabs at the top of the website to navigate between these sections:

- The Introduction tab explains the tool’s context and goals.
- Search Profiles addresses which images will benefit the most from manual markup.
- The Quick Minutiae Search Profile and Detailed Markup Profile tabs hold the bulk of the tool’s content.
- Self Evaluation contains exercises to help measure your progress after working through the rest of the tool.
- Resources contains a glossary and external references where you can find additional information about EFS markup and the organizations involved.
- The Help tab contains this guide.
Secondary Navigation
To move around inside these tabs, use the chevron buttons near the top of the screen:
Navigation Within Features
Some features, like Minutiae, include a second description section. Use the buttons under the feature header to switch between these sections.
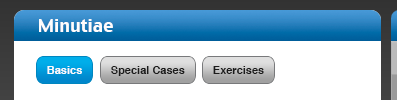
- To practice marking up a particular feature, click on the Exercises button.
- Click Check My Answer to see an example of expert markup, then click Return to Exercise in the top right to continue practicing.


Inside each feature section, you will find a description of that feature on the left and example images on the right.
Zooming In and Out
To zoom in on any image, use the zoom slider to the top right of the image.

The image navigator is at the bottom left of the image. Click and drag inside this box to move the focus.
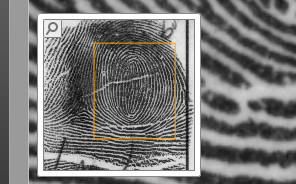
You can turn the image navigator on and off by clicking the magnifying glass icon next to the zoom slider.
Navigating Through Images and Exercises
The left and right arrows on either side of each image let you move between example images and exercises.
Activity Tools
Each activity has a set of tools specific to the markup needed. Check the instructions in the exercise text area to learn how to use a particular activity. To create new markup, you will need to click on a specialized tool button. Every activity also has a Delete or Erase button. The Delete and Erase buttons have different actions depending on the feature:
| Icon | Tool | Feature | Outcome |
 |
Erase | Ridge Quality Map | Clears the specific are you move the cursor over |
 |
Delete | Center Point of Reference Region of Interest |
Clears Entire Canvas |
| Dots and Incipients Distinctive Features Cores Deltas Minutiae |
Will delete specific mark when that mark is clicked on |
You may notice that marks like minutiae, cores and deltas appear to be smaller on palm images than on fingerprints; this is because the palm impressions are quite large. Zoom in on the image by scrolling up with the mouse wheel or using the zoom buttons, and the feature mark size will increase.
Download and print the Help documentation